UPDATE: This website design eBook was originally published on 31 January 2019 and updated on 28 December 2020.
Did you know that over 80% of shoppers do research online before buying? The truth is, simply having a website will put your business in front of more customers. And if your website offers useful articles and videos, a mobile-responsive design and solid search engine optimisation (to rank well in search results), your sales will grow. But wait — isn’t website design complicated?
Not anymore. This is a complete beginner’s guide to building your first website, from scratch. Don’t worry; I’ll explain it all in non-technical language.
A website can sell products or services online, generate leads and connect with customers — all while you sleep.
If you’ve built a website before, you’ll find useful information here on how to improve your site, moving it ever-closer to a Page 1 search engine ranking.
You’ll also find over 100 helpful links and resources along the way, and suggestions for support and outsourcing if you need help with any of the steps.
Toolbox:
Website planning quiz
Quick guide: Build a DIY website in 6 steps
Cheat sheet: Make a WordPress website in 5 steps
Editor's note: GoDaddy's Websites + Marketing is an all-in-one solution that bundles an easy website builder with marketing tools and the pro advice you need to succeed. If you don't plan to sell online it's free.
Website design explained in simple terms
This is a comprehensive guide to building your first website. Bookmark this page so you can refer back to it as you work through the steps.
-
Plan your website.
-
Give your new site a name.
-
Create content both humans and search engines will love.
-
Design and build your website.
-
Track, assess, improve.
You’ll get the best result if you take the time to understand your goals and plan your new website before starting. That way, your site won’t just look good, it’ll help you achieve your business and revenue goals.
Ready to learn how to start a website? Let’s go.
Step 1: Plan your website

This guide is designed for any businesses creating a first website, whether you’re:
- Building a brand new business.
- Putting an existing business online.
- Opening an online store for the first time.
The basic principles of building a high-quality website are the same no matter what type of business you have. Once you know the basics, you can customise your website to suit your industry and your business style.
First, define your unique selling proposition (USP)
Your website needs to communicate very clearly what you do and who you do it for, so this is the first step in starting a website. Create a website without a clearly-defined USP and your results will be mediocre at best.
Your USP is a statement about what your business does best and why customers should choose you.
Try completing this sentence suggested by Bry Larrea in a post for Noteworthy - The Journal Blog:
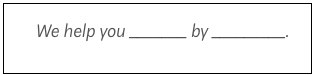
A few examples:
- We help you [enjoy a comfortable retirement] by [sorting out your difficult financial situation].
- We help you [buy your first home sooner] by [arranging your loan and insurances fast].
- Be [more productive] with our new [calendar and to-do list app] that [changes how you plan your day].
You don’t get long to make a first impression. If your website’s purpose isn’t clear, visitors will leave after just a few seconds. That’s why you need to define your USP before you start building your website. As you move through the steps below, periodically ask yourself, “Does this communicate my USP?”
Resources: How to create a killer USP
Identify likely customers
It’s impossible to appeal to everyone, and in fact, it’s best to be specific about the customers you want to pursue.

You’ll choose different website elements depending on whether your likely customers are:
- Families with young children who like holidays.
- High school students searching for their first part-time jobs.
- Women who enjoy lifting weights.
In order to communicate with your ideal customers, you need to know who they are and what they want. Marketers often create a profile of their ideal customers, including giving them a name, age, hobbies, a career and interests. It’s called creating buyer personas.
Alternatively, customers can be grouped by a shared problem or desire. Are they all stay-at-home parents (regardless of gender)? Or are they all small business owners turning over less than $500,000 a year?
Once you’ve defined who your customers are, you can create a website that explains how your product or service solves their specific needs.
You’ll also use a tone of voice that is appropriate to your target customers, and you’ll use appealing images and brand design.
Do you want to be funny and irreverent? Informative and serious? Don’t get bogged down in industry jargon, because that gets boring. But you can choose certain words to appeal to your target audience.
Set goals for your site

It’s also important to define what you want your website to achieve for your business. Even more importantly, what do you want customers to do on your website to achieve your business goals? Book an appointment? Place an order? Sign up for your newsletter?
When setting goals, it’s best to be specific.
If you’re in the early stages of your business, going through this process is vital to creating a solid business plan. If you haven’t already created your business plan, now is the time. Your business has a greater chance of success when you go through this process. A business plan will also come in handy if you ever decide to apply for a business loan.
Resources: Business Plan Template and Guide from business.gov.au
Back to your goals — do you see your website primarily as a:
- Learning hub or a platform to deliver online training?
- Online brochure that promotes what you do?
- Membership site or online community?
- eCommerce site where people can buy directly from you?
- A blog of your own thoughts, opinions or advice?
- A news site?
- A gallery of images?
- Or something else entirely?
What do you want customers or visitors to do on your website?
- Buy something (either a physical or digital product/service).
- Download documents or courses (one-time or subscription, free or paid).
- Contact you to discuss professional services (photography, copywriting, accounting).
- Learn about a topic; read, like and share.
- Participate in a community of like-minded people.

Working out the answers often feels hard. But after you’ve gone through the process, you’ll know exactly who you’re speaking to, and what they need to hear.
The basics of brand identity
Many businesses will have a name and brand identity already decided by this point. Your website needs to suit your brand’s personality, from photos to logo, fonts and language.
Incidentally, this goes for your domain name, too. Because it serves as your web address, you’ll get more mileage out of your domain if it has your business name right in it.
If you haven’t settled on a business name, choose it in tandem with your domain name.
If you choose your business name without checking to see if the matching domain name is available, you might have to settle for a second-rate web address.
Resources:
Read this post before you start your company name search
How to name a business
Let’s come back to brand identity when we discuss web design later.
Now lay out your web pages
Start by answering these questions:
- How many website pages do you need?
- What will each page be about?
- What should the reader do on each page? Choose one action.
- Ideally, how does the visitor travel through your website?
- How many pages do they need to view (or how many clicks) to make a purchase?
- Do you need an eCommerce site or payment platform?
- How many products do you have, and how many product categories are there?
- Do you need a login page or secure membership system?
- Do you need a blog, news feed or photo gallery?
- Do you need an events page?
- How can customers contact you?
The answers will help you to decide what kind of website you need, and how the pages fit together. This is called defining your site architecture.

Once you know your audience and what you want them to do on your new website, it’s time to decide what kind of information they’ll need. Specifically, what do your customers need to know about your product or service to make a decision to buy from you? This will determine the structure and content of your website.
Sample layout A:
A simple professional services website would include, at minimum:
- Home page.
- About Us.
- Services overview page.
- Testimonials/reviews, case studies or a “Working with me” process page.
- Contact page.
- Terms and Conditions and Privacy Policy.
Sample layout B:
The most basic online retail website would need these pages:
- Home page.
- About Us.
- Products page.
- Frequently Asked Questions (shipping, returns policy etc).
- Contact page.
- Secure payment portal (possibly opening in a separate window).
- Terms and Conditions and Privacy Policy.
Needless to say, the more products you have, the more pages you’ll need.
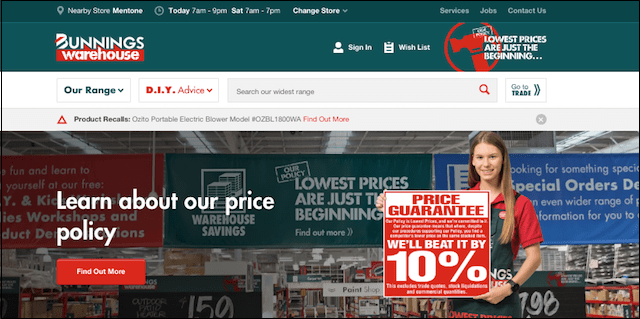
At a guess, a website like Bunnings might have 500,000 different product pages — maybe more! That’s a very sophisticated website and definitely a job for a professional web design team to build.
Even with a lot of pages, you need to keep the site architecture simple. If you have important pages that require too many clicks to find, customers will get lost and drop off your website.
Case study: Real estate website
The first step in sketching out your web site architecture is to describe how you expect a customer to move through your site, step by step.
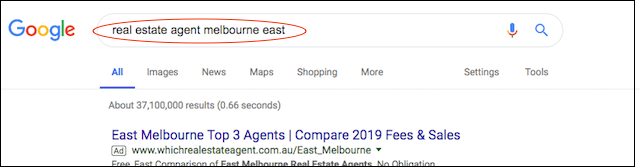
- Let’s say a prospective customer searches “Real Estate Agent Melbourne East” and lands on a Melbourne realtor’s About Us page.
- They like what they read, so they look to the menu and visit the “Sold Properties” page. Here they see a nearby house sold by the agent. It’s a similar size to the customer’s house, sold for a great price and the happy seller has written a glowing testimonial about the agent.
- The customer clicks the call to action (CTA) button that reads “Sell a property like this one.”
- The link leads to the Contact page where the customer fills in a contact form. Or the link could go to a calendar widget for the customer to book an appointment with the agent.
Upon submitting the form, they receive an instant Thank You that says the agent will be in touch within 24 hours.
Pretty good right? Just four clicks from start to finish!
Map out the process for your website to see how many actions customers need to take to buy from you or book an appointment (or whatever the goal for your website).
Resources:
How to set up an eCommerce business in Australia
eCommerce web design tips and tricks
Recap: Plan your website
- Define your unique selling proposition (USP).
- Set goals for your website.
- Lay out your web pages.
Step 2: Give your new site a name

As mentioned before, a domain name is used for a web address. Every website must have one, although many companies will offer to let you ride their coattails for free with a domain like LilysBikeShop.GoDaddySites.com.
Free domains can come with a trade-off.
While a free domain like LilysBikeShop.GoDaddySites.com saves you the cost of registering your own domain name, you lose the search engine benefits that come with a unique domain name such as LilysBikeShop.com. If your business succeeds and you decide to sell it someday, that domain name would be a valuable part of the business package.
Editor's note: GoDaddy also offers free custom domains — claim your free domain here.
Choosing a domain name
Domain names are like snowflakes: there are no duplicates.
Let’s say you decide to name your new clothing line Dainty Hooligan. Type DaintyHooligan.com into the box below to see if it’s available for use.
Right — already registered to someone else. In fact, that someone else has had the exclusive rights to that domain name since late 2010 and maintains a vibrant eCommerce site on it.
This isn't alway true, of course. Sometimes people own domain names they're not using for websites. In this case, you might be able to get the domain you want by making an offer to the owner. You can use GoDaddy’s WhoIs lookup tool to get contact details and ask if the owner is open to selling.
As you name your website, the perfect scenario is for you to:
- Choose your business name based on which matching domain names are available.
- Buy both the .com and .com.au versions of your domain name. This will keep competitors from buying one of them and using it to pull traffic away from your website.
If you have an established business and you’re setting up your first website, type your business name into the search box above to see your domain options.
How to choose a domain name you’ll love for years
Here are a few things to keep in mind when choosing your domain name:
- If possible, it should match your brand/business name.
- If your business name isn’t available in .com and .com.au, see if you can get the .com and .com.au of your flagship product.
- Keep it short as this will be easier for clients to remember.
- Is it easy to type and spell? Do the friend test — say it out loud to a friend and ask them to write it down. Do they spell it the way you expect?
- Avoid numbers and hyphens.
- Stay away from anything that’s too close to a competitor’s name or a trademarked name.
One more thing: think beyond .com and .com.au. There are now hundreds of different domain extensions — including .melbourne and .sydney — opening the way to many more good names (browse the entire list here).
When you’ve settled on a domain name, jump in and buy it before someone else snaps it up.
Resources:
How to get a domain name that will bring in local customers
How to identify a domain owner so you can get the domain name you want
Set up professional email to match

Many entrepreneurs use free email accounts in the hungry early days of startup. The fact is, anyone can get a Gmail account and everyone knows it. When you have professional email set up — Lily@LilysBikeShop.com, for example — your business looks more trustworthy and established.
You’ll need a couple of email addresses for a sole trader, and one for each team member for a company. The most common email address types are:
- Name@ or FirstName.Surname@ for direct contact with each team member.
- Info@ to filter enquiries, preventing your individual email address from appearing online.
- Admin@ — great for logins and business subscriptions.
- Accounts@ to tag invoices and disputes for expedited review.
- News@ for enquiries related to your newsletter or blog.
You can even set up professional email addresses for your virtual assistant or bookkeeper.
Resources:
How to create a new email account for your small business
Managing email as your small business grows
Recap: Give your new site a name
- Choose and register your domain name.
- Set up professional email to match your domain.
- Simplify by consolidating all services in one place, as moving a domain is easy.
Step 3: Create content both humans and search engines will love
Plenty of “How to create a website” guides will tell you to do things in this order:
- Design the website.
- Build the website.
- Write website text, take photos and produce videos.
- THEN think about search engine optimisation (SEO).
I completely disagree with this approach to SEO as an afterthought.

If you want your website to rank well in search, you need to think about SEO first. Remember, very few people look beyond Page 1 of search results, so that’s where you want your website to appear. And getting there takes some forethought.
SEO defined
SEO is the process of making your website show up in search for specific keywords. Search engines like Google, Yahoo! and Bing use complex algorithms to decide which websites are the best answer to a question or search phrase. Search engines rank the websites in order of how well they match the phrase, with the top result being the most relevant and so on.
The goal is to appear among the top three results for your keyword.

If you want your fashion business to rank well for a search term like “hand painted silk scarf,” then you need to convince Google that your website is a good match for that phrase. SEO can be a long game of continued tweaking, and it takes patience and hard work to reach the top spots. But it’s worth it. The top organic listing gets over 30% of all clicks.
You need to think about SEO factors from the very first phase of starting a website.
First, do keyword research
Start by spying on your competitors. That’s right, we’re getting sneaky in this first step. You can use a tool like SEMrush, which has a free version that lets you see which keywords and topics your competitors are ranking for.
By checking which keywords and phrases your competitors are focusing on, you can try to target the same or similar phrases. After all, people who search online for their products will likely type in the same words and phrases when looking for your products.
Now make a list
Take the list of keywords you got from SEMrush and think of 50 — or even 100 — keywords and phrases that are at all related to your product or service. Keep in mind that some will be easier to rank for than others.
Let’s use 'knitted baby jumpers' as an example to take a look at top terms on SEMrush:

The blue text shows terms similar to 'knitted baby jumpers;' the volume row shows how many people are searching online for each phrase.
By comparison, here’s the same chart using a search for the term 'life insurance:'
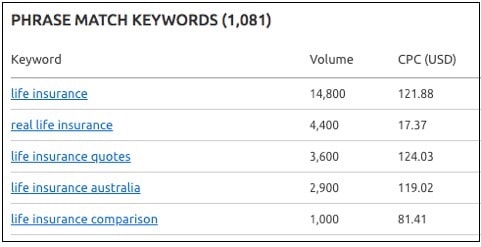
The search volumes are huge; but then so is the cost per click (CPC)! That means if you were to buy paid advertising on any of these search terms, you could expect to pay the CPC fee every time someone clicked on your ad. Usually, higher cost means more competition, and companies willing to spend more to gain clicks.
Apparently, insurance companies are willing to pay USD$121 just to get a customer to click on their ad (at time of writing, that’s a staggering $169 in AUD!). This is data from paid keyword targeting, but it means that the big insurance companies will have spent a fortune on organic (unpaid) SEO as well. Competition will be fierce because everyone’s fighting for the top spot.
Here are a few ways to expand your keyword options:
Long tail keywords
If you find that your field is very competitive, consider focusing on long tail keywords. These are longer phrases with more words in them.
It’s hard to rank for a broad term like “home builder” but it should be easier to rank for a long tail keyword phrase like “10-star energy rating home builder.” Creating a page for a long tail keyword like this will bring in customers who really know what they’re looking for.
Synonym
Google’s very clever at understanding synonyms, and it usually knows when you mean the same thing but say it in a different way. Google’s search results know that a dog leash, dog lead and dog harness are to do with the same topic, so no matter which you search for, it’ll probably give you options for all of them.
Think of synonyms for your product names and use those as well as your main keywords.
 Solving the customer’s problem
Another approach to finding SEO key phrases is to focus on the problem your product or service solves. For example, a customer might search for “how to fix a blocked drain” rather than “plumber west Melbourne” if they want to try fixing it themselves first. By focusing on the problem, a plumber can try to rank well for “how to fix a blocked drain” and provide helpful information. Some people will be able to follow the instructions and fix it themselves, but others will decide it’s too hard and they’ll call the plumber offering the advice instead.
Resources:
SEO optimisation: All it takes is a little know-how
Google’s Keyword Planner
Pro tip: there’s a free seven-day trial of the SEMrush Pro package, which you can use to plan your website’s focus keywords.
Write website content
Some of the best websites start with content first, then the design of the website follows the message. So it’s time to sit down and start writing.

In the site architecture stage, you mapped out the number and type of pages you’ll need, and how they relate to each other. Now you should create a document with a page for each of your website pages.
Professional copywriters call this document the “copy deck.” For each website page, the copy deck includes:
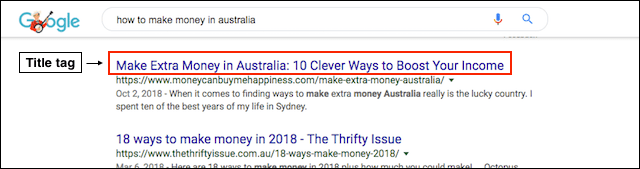
Title tag
The text that appears in the tab at the top of your browser and in your search results, usually 60 to 70 characters long. Includes the page headline and sometimes other words as well.
Headings
Remember that most people skim read. Our eyes search for the information that we need, and when we find it, we slow down and read that part in detail.
Headings are also a design indicator, giving the reader a clue about the importance of the text. Here’s an example of how different type sizes capture varying levels of attention:
H1: GoDaddy’s H1 Heading Style
H2: GoDaddy’s H2 Heading Style
H3: GoDaddy’s H3 Heading Style
H4: GoDaddy’s H4 Heading Style
Headings also show Google bots which words are important. Use the SEO keyword for each page in the main headline (the H1 heading), plus a couple of times in your subheadings (the H2 headings).
Main text
Fill in the details about your product or service under the subheadings. Use your keyword or phrase a few times, but don’t overdo it. Make sure it sounds natural to the reader. Tell a thorough story about your product or service, and try to write at least 300 words on each page. But don’t write more just for the sake of it. Keep it interesting and relevant.
Rather than using the phrase “10-star energy rating home builder” 10 times on a page, a builder might talk about:
- How energy ratings are calculated.
- How homes can achieve a 10-star energy rating, including do it yourself projects.
- The benefits of a 10-star energy rating (annual savings, resale value, etc).
- What to look for in an energy-efficient home.
- How builders use high thermal mass materials to keep a home warm in winter.
You see, it sounds natural, interesting and informative to cover the topic from a few angles. That makes readers happy, and Google is pretty happy with that approach too.
As you write, look for opportunities to link to other pages on your website. On your Home page, you’ll likely refer to a couple of your key products or services; include links to those specific pages there. On a product page, you can create links such as “you might also like this product” suggestions that take the reader to those product pages when clicked. These internal links improve your SEO.
Pro tip: Use short paragraphs broken up by subheadings and bolded text on your web pages to highlight important information and catch the reader’s attention.
 Call to action
Each page needs a call to action (CTA) like the Get Started button at right. This is where you ask your site visitor to do something specific that moves them towards a booking or a sale. The call to action can be a line of text with a link, or it can be one or two words on a clickable button. For example:
- Get your financial mess sorted out. Book your no-obligation chat today.
- Start my free 30-day trial.
- This early bird offer is for a limited time only [Order Now].
- Sign up to receive a doable social media marketing tip each week.
Keep the CTA simple and appealing. Ideally, the call to action will tie back into the problem that your business solves for the customer. By including phrases like “no-obligation chat” and “free 30-day trial,” you remove the customer’s anxiety around making a decision.
Resources:
How to write a copy deck in 5 easy steps
The secrets to enticing product descriptions

You’ll learn a lot as you’re going through the process of writing your website content. The process forces you to articulate very clearly:
- Who each product or service is for.
- What makes the product or service appealing.
- The features and benefits that make it worth paying for.
- How much better their life will be once they’ve bought your product or service.
Sometimes these aspects are difficult to define. If you’ve gone through the planning phases in detail, you should be most of the way there. Now it’s about fine-tuning your message.
Customers have a certain level of anxiety about shopping online. What if I don’t like it? What if it doesn’t fit? How can I tell if the quality is any good? It’s your job to convince them that they need your thing, and why it’s the right choice.
Detail and emotion
Your product descriptions should be unique to each page. Each one should include the information that customers need to make a decision, like:
- What the product does.
- The size or dimensions.
- Colours and other options (such as monogramming).
- Parts that a kit includes and so on.
Include your long tail keywords in product descriptions and use a variety of similar words as appropriate. You can also tell the story of the product; give it some personality and make it appealing.
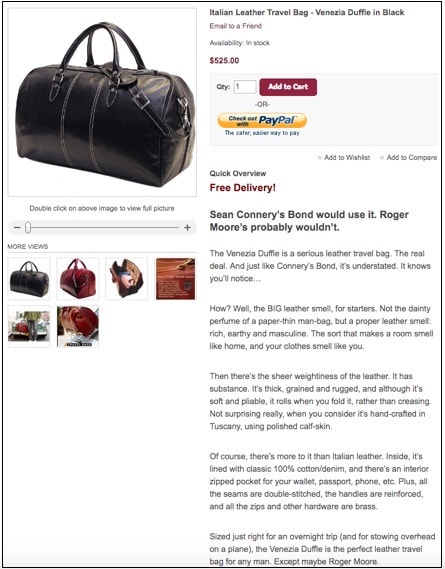
Here’s a product description for a leather duffle bag that not only capture’s the brand’s personality, but makes the reader almost able to smell the leather through the screen. Now that’s good copywriting!
If you can evoke emotions in your customer with your product descriptions, they’ll almost be yelling, “shut up and take my money.” And that’s how you make sales through your website.
GREAT product photos
If you sell exclusively online, your photos have to be good because customers can’t feel or try on the product. Use several from different angles or close-ups. Include at least three to six photos per product if you can.
- If you sell anything wearable, include photos of the product itself and of it being worn by a person (or pet, or doll and so on).
- If it’s a decorative item like a vase, show the vase in front of a plain background, along with a lifestyle photo on a coffee table.
The best product descriptions get a big “Yes” from the reader. Here’s how it’s done.
Case study: SweatBlock
Let me show you a great example from an antiperspirant called SweatBlock.
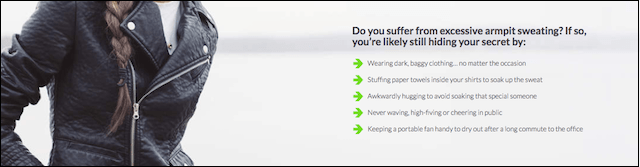
First they describe the problem “Do you suffer from excessive armpit sweating?”
They know their target customers can really relate to the agitation points (with the green arrows), to the point where the customer is thinking “Yes, you’ve just described me; that’s EXACTLY how I feel!”
Then SweatBlock shows the customer how their product solves the problem:
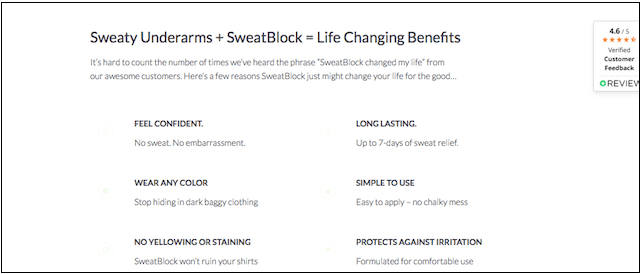
A video shows what life is like after using this product. The customer enjoyed a sweat-free lunch date and stayed calm and cool during a job interview. Yep, for the right customer, it’s “shut up and take my money!”
Did you notice that the writing includes the word ‘you’ a lot? It’s like the website is having a private conversation with every single customer. Plus, it makes the customer imagine themselves in the story, and better yet, imagine themselves achieving the outcome of the story.
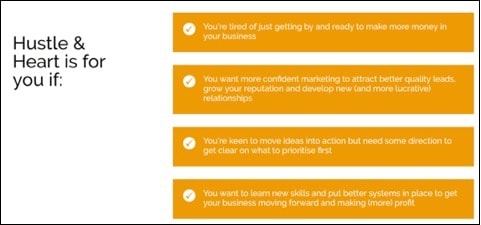
Case study: Hustle & Heart
The same applies for professional services pages. Here’s some great writing by Australian business coach Brook McCarthy from Hustle & Heart in her coaching sales page.
Brook uses a technique copywriters call PASO, or Problem, Agitate, Solution, Outcome.
First, Brook identifies the problem that small business owners have: they are scared and they feel like they’re out of their depth.

Brook includes a video where she speaks directly to the viewer, “Do you sometimes find promoting or marketing yourself online quite excruciating? Hustle and Heart is for you if you’ve lost some of the passion that led you into working for yourself in the first place.”

Here comes the agitation: “What is your fear of promoting your business actually costing you?” Yep, that stings doesn’t it? The reader is scared to put herself out there, but she knows that if she doesn’t promote her business, it will fail, and that’s an expensive mistake.
Brook goes on to describe the course and talk about who it’s for. But then she shows the solution that the customer will receive when they complete her course:
- Learn new skills.
- Create systems.
- Make money.
- Be more confident.
- Attract better quality leads.
The reader is nodding, and thinking, “Yes, this sounds great, I want ALL of those things!”
The final section presents the outcome. Brook does this by showing testimonials from previous participants. Her clients share, in their own words, how they felt about the course and how it transformed their business. The testimonial includes a photo of the participant, their full name and their business name. Including these details gives testimonials a lot of credibility.
Try writing in this style for your products or services and see what happens to your sales rate.
Resources:
How to create a compelling eCommerce product page
The PASO Copywriting Formula
Learn to write about features and benefits with this free 3-tip copywriting course
Check what you’ve written for readability
Readability refers to how easy (or hard) it is for people to read and understand a piece of text easily. A readability score is a a computer-calculated score that tells you roughly what level of education someone must have to be able to read what you’ve written.
The lower your readability score, the better as more people will understand your website.
To check your content’s readability, paste it into a free readability tester such as the Hemingway Editor. Hemingway highlights difficult sentences and gives suggestions for improvement.
This article is testing at a nice Grade 7 reading level. Simple content is more effective for sales, especially when customers are in a hurry or reading on a mobile.
When to hire it out
If you’ve started the process of writing your own website copy and are finding it difficult, you can outsource to a professional copywriter.

Pro copywriters are experts at extracting benefits and presenting a compelling story.
If you’re struggling with creating text, photography or videos — or if you’re simply too busy running your business to do it yourself — outsource it. Don’t let the content hold up your website.
You can do a Google search for ‘website copywriter’ or ‘small business video’ and your location, to find local pros. And don’t be afraid to work with someone remotely.
Resources:
How to write product descriptions that tell a story
Best practices for using images on eCommerce product pages
3 easy small business videos you can make today
Recap: Writing your website content
- Do keyword research.
- Write your website content.
- The secrets to enticing product descriptions.
- When to hire it out.
Step 4: Design and build your website

Now that your website content is ready to go, you’re ready to start your web design-and-build phase.
This part is where it gets exciting; all your preparation starts to come to life.
Plenty of small business owners pay developers thousands of dollars to create a website. But what if you could do it yourself, save a ton of money and gain the knowledge to maintain it yourself too?
DIY or DIFM: consider timing and costs
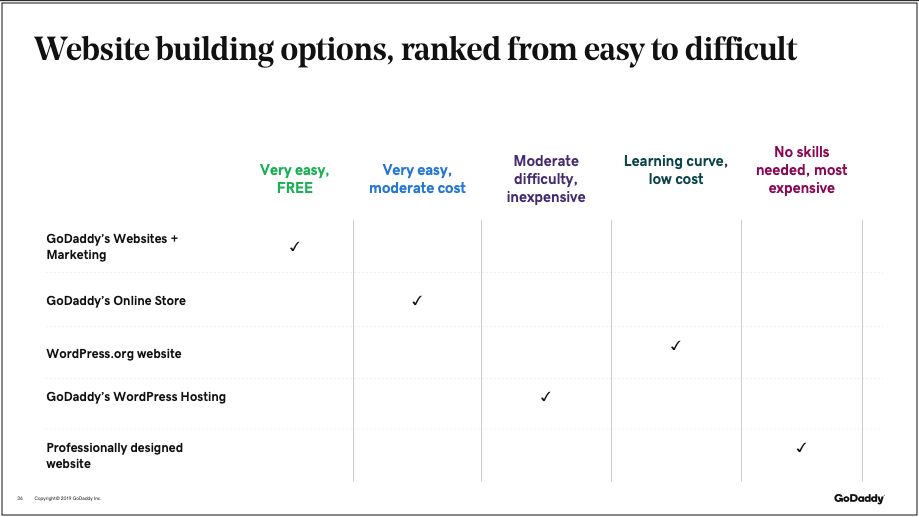
Creating a do it yourself (DIY) website can save a lot of money, compared with the do it for me (DIFM) option of hiring a website developer. There’s a learning curve if you’ve never built a website before, but it is achievable for anyone with basic computer skills and a bit of time.
No experience and a low budget but plenty of time? Try a DIY site builder.
You’ll probably surprise yourself by building a beautiful website for a low cost. There are several easy website builders — including GoDaddy’s Website Builder — that allow you to build a basic website in just a few hours. For many people, that’s enough to get a business started online. Plus it's free!
Those who plan to sell products on their websites can use the eCommerce website builder to quickly build a fully functional eStore.
If you have a tight timeframe and money to spend, you could hire a website developer.
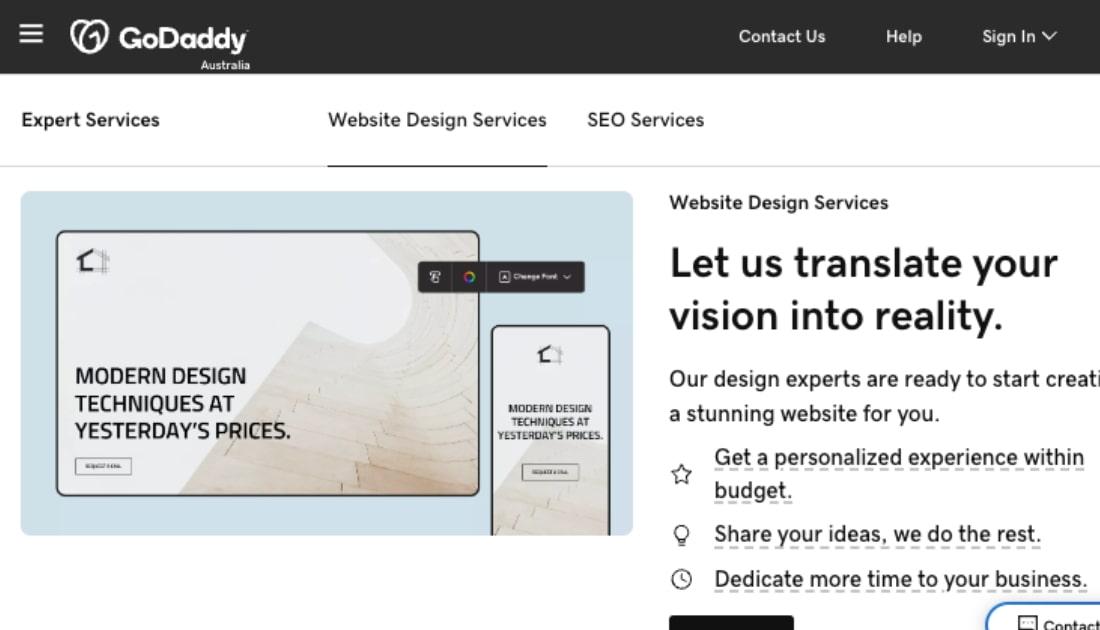
For a more customised site, GoDaddy offers a professional Website Design Service. Work out what’s best for your business by balancing the costs and the timing.
How to find a reliable pro designer
Before hiring a web designer, you’ll want to ask:
- Does the website developer design and build, or only build? Is the design handled in-house or do they outsource?
- Will they make updates for you? If so, how often and how much will that cost?
- Will they teach you how to edit content and add new pages?
- Will they set up and manage hosting, or do you have to do that yourself?
- If they say they do SEO, exactly what does that include?
- Do they set up plug-ins, security features and backups?
- Will the website be mobile-friendly and responsive?

Last, what is the payment schedule? Expect to pay at least 30 to 50% up-front, and the remaining payments in one or two more instalments. Most website developers will not hand over access to your new website until the final invoice is paid in full.
You should also ask how long the process will take. In-demand website developers might have a waiting list of a month or more, and the design and build process could take anywhere from a couple of weeks to another month, or longer if your website is huge. Plus, the total timing depends on how quickly you reply with your comments and changes.
The WordPress option
Got your heart set on a WordPress website? Although there’s more of a learning curve with WordPress, it is definitely doable to build one yourself. There are numerous free resources online to teach you everything you need to know about this very popular tool.
WordPress is free so all you need to buy is a domain name and hosting.
Paid tutorials like “How to build an SEO friendly WordPress website” are also worth considering. This step-by-step on-screen guide to starting a WordPress site is based on solid SEO principles.

Don’t worry if you’ve never built a website before; this course covers everything in jargon-free lessons. The course includes comprehensive information about every checkbox to check, every button to click, and what to put in each text field, so you won’t miss anything.
Depending on the theme and web hosting you choose, you could do this course, buy a domain, buy a theme and set up a year of hosting, all for about $600 to $700. AND you can get it up and running in one day.
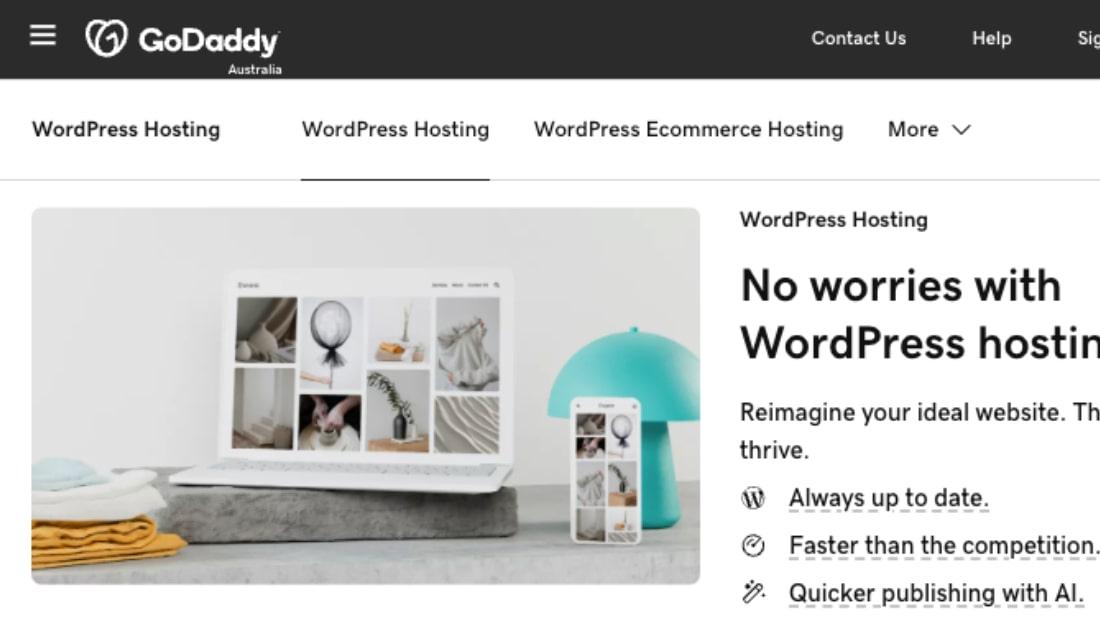
No time or interest in building a WordPress website by hand? Try Managed WordPress from GoDaddy and use their Page Builder to build your site quickly.
So clear your calendar for one day and get cracking. You’ll surprise yourself with what you can achieve, and you’ll learn all about how SEO works and how to maintain and improve your own website.
Resources:
Web design: do it yourself or hire someone else?
4 of the best online site builders reviewed
How to build a WordPress website
Start with a pre-built template or theme
Depending on which DIY tool you’ve chosen to use, you’ll use either a template (GoDaddy) or a theme (WordPress) to build your website. Both templates and themes are pre-built websites ready to be customised with your own text, photos and videos.
Answer two questions and Websites + Marketing suggests a template for you.
Selecting a WordPress theme is a bigger project, if only because there are so many to choose from. Poke around the WordPress theme gallery to start. Use the Feature Filter to narrow down your options.

Create a list of themes you like and that suit your brand identity. Once you have your collection of favourites, look at what’s similar or interesting about each one. Perhaps you liked the use of colours, found interesting banner designs or liked certain layouts. This will help you choose a theme you’ll be happy with.
Remember that you’re choosing the basic structure and layout of the website at this stage. Don’t get swept away by colours or photos because these can be replaced. Instead, try to choose a website template that has:
- The features you need — e.g. online store, photo gallery, member login or contact form.
- A simple navigation/menu structure.
- Mobile responsive design as standard.
Everything else can be customised later — fonts, colours, photos, menus and the order in which things appear.
Both Managed WordPress from GoDaddy and the global community of WordPress developers offer a huge variety of themes (just Google ‘WordPress themes’). You can get lost for hours looking at all the lovely designs! Plenty of themes are free (or included with your plan), some you have to buy once and some you have to pay and renew yearly.
Make sure it’s responsive
We’re on our mobiles all the time now. In fact, a mobile is the first thing we grab when we want to look something up online (unless we’re at work and trying to be sneaky; then we might stick with the old desktop for the search).
So it should be no surprise that Google places a high level of importance on mobile responsive website design.
Responsive design means that a website will look great and be easy to use on any device.
There’s even a test for how mobile-friendly a website is. Just for fun, let’s do a test on GoDaddy’s site. Copy and paste the URL of the page you want to test here:
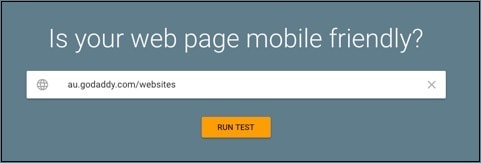
Then RUN TEST and .... this GoDaddy web page passes the test:
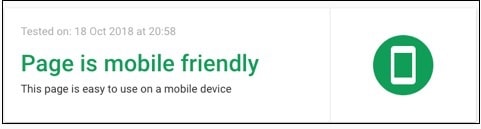
Basically this means that when a visitor goes to au.godaddy.com/websites on a mobile device:
- The web page automatically adjusts itself to suit the screen size, whether mobile or tablet.
- Text size is readable on a smaller screen.
- The text fits on the screen without pinching or zooming.
- Buttons are clickable with a finger; they’re not too tiny or too close together.
- The page size (measured in megabytes) is small enough to load quickly.

Luckily, many good website themes are mobile responsive out of the box. Any website you create using GoDaddy's Websites + Marketing, Online Store or Managed WordPress is mobile responsive.
Many (but not all) WordPress themes available online are mobile responsive.
This is why it’s important to make sure the WordPress theme you find online is mobile responsive. It’s extremely fiddly to add that feature later — in some cases, impossible. In which case, you’re up for a fresh build.
Why go to the trouble to check for responsiveness? Google gives more favourable rankings to mobile-friendly websites. In fact, Google places such a high importance on mobile-friendly design that it has started penalising websites that are not mobile-friendly. That’s right — as of July 2018, any website that's not responsive is pushed down the rankings.
When it comes to search rankings, Page 1 is the only place to be.
To hear more about how Google prioritises responsive websites, straight from John Mueller of Google Switzerland, listen to this Recipe For SEO Success podcast episode.
Resources:
4 ways to retain local customers with mobile
Google’s information page about mobile friendly website design
What are the top three things I should know when building a site for mobile devices?
A note about accessibility
It’s important to know who your audience is, and consider their skills and abilities. For example:
- If your customers are people over 60 who might all need reading glasses, keep your font sizes reasonable for them.
- If your website is for people living with a disability, or for their carers, keep the design simple and easy to navigate.
People with low vision use screen readers; an app that reads website text out loud. A screen reader can’t read text that’s embedded in an image; it can only read words stored as text. Also, screen readers can’t interpret images, so it helps to use Image Alt Text to describe, in words, what the image is about.
Here’s an example about how Alt Text works, from MOZ:
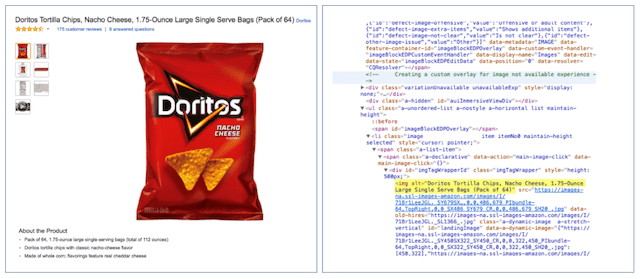
There are basic design principles that apply for every user, regardless of ability. The main points follow below, but it’s certainly not a complete list. If you think you might need a fully accessible website, visit the Web Accessibility Initiative for advice.
Font colours
Have you ever tried to read a website with light grey text outside on a bright sunny day? It’s nearly impossible to read and it’s infuriating. If they can’t read it, customers will simply give up and find another website to read or buy from.
Coloured fonts on coloured backgrounds
The same goes for low-contrast colour differences, like white text on a yellow background. I’ve got great eyesight and that’s even hard for me, so imagine what it’s like for people with low vision or people who are colour blind or have trouble telling the difference between certain colours. Don’t make your website difficult for people to read just because you like certain colours.
Busy backgrounds
Intricate images or patterns with text over the top are super hard to read. Keep banner images simple if you’re overlaying text.
For main body text, the easiest to read is black text on a white background.
Put simply, accessible design makes your website easier to use, and more enjoyable for everyone.
Install plug-ins (WordPress) and an SSL

A plug-in is a software packet that you can install on your WordPress website to add a special feature. There are thousands of WordPress plug-ins for just about everything, including:
- Adding contact forms to your site.
- Newsletter subscription pop-ups.
- Image resizing.
- Adding a payment portal.
- Countdown timers for special offers or fund drives.
- Backups, security and so much more.
Plug-ins can do amazing things — and the customisation they add is one of the reasons the world loves WordPress. Here are some of the most important plug-ins:
Yoast SEO
This popular plug-in helps you tweak your website content so search engines can read and understand what it’s about.
Smush
Smush compresses your website’s images to a small size so they’re faster to load (How-to).
Malware scanners
Protect your website from malicious attacks by installing an anti-malware plug-in. GoDaddy also offers a scan and remove tool.
Analytics
These plug-ins help you understand your website traffic data in order to adjust your website for better results.
Backup
Backup your web pages automatically so you can quickly restore them if you lose data due to accident or cyber attack. GoDaddy also offers a backup service that includes daily malware scanning.
WooCommerce
Turns your WordPress website into an online shop, handling everything from product listings to cart, plus payment integrations with PayPal and Stripe.
Refer back to your planning phase to decide which plug-ins you’ll need. Remember that having too many plug-ins can slow down your website load speed, so choose the most important ones first.
SSL encryption: no longer optional

Your new website definitely needs an SSL certificate. This is a digital data file that encrypts information sent between site visitors and your website so hackers are unable to intercept and steal passwords or banking details in transit.
While SSL encryption was once a must-have for eCommerce websites, as well as those that collect or store any kind of personally identifiable information, it’s now essential for ALL websites.
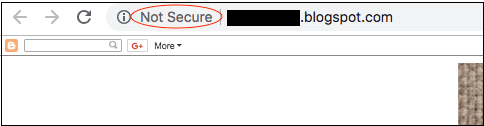
Google labels any website without encryption as ‘Not Secure.’
Keep in mind that:
- More than 94% of Australia’s searches run through Google.
- Cybersecurity is on everyone’s mind, thanks to recent data breaches at MyGov, Service NSW and Zoom.
These two factors make it unlikely that potential customers will interact with any website that looks suspicious in any way.
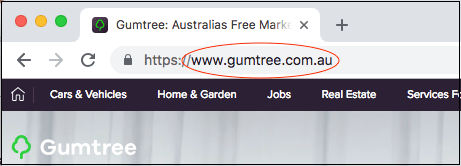
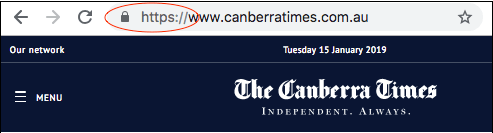
You’ll know if a website is secured with an SSL certificate because it has a URL starting with https://, while an unsecured website starts with http://.
As I said before, cybersecurity also matters to customers.
Would you hand over your credit card number to a website marked ‘Not Secure?’
I wouldn’t! Credit card fraud is a major pain for customers, resulting in hours of lost time cancelling cards and automated payments then advising creditors and utilities of the new card number.
So don’t risk the damage to your business reputation; make sure your website is secure and your customers stay protected. Note: all four plans of Websites + Marketing include an SSL Certificate.
Resources:
Why hackers target small business websites
Is your website safe? Try this free online virus scan
Create pages and insert content

After your website is set up, it’s time to flesh it out. Create your site structure according to your plan by adding the pages that you need, and the subpages that logically sit below them. You’ve already written all your content, so this phase is as simple as copy and paste!
Create each page and add the content, remembering to include:
- A page title that includes your keywords for the page.
- A meta description that will display in search listings.
- H1 through H4 Headings (you can adjust the design hierarchy of the headings now, making H1 bigger and bolder than the other headings).
- Paragraph/body text.
- A specific call to action for each page that tells the reader what to do next.
Here’s where you’ll find instructions on adding pages to Websites + Marketing and Online Store.
Use photos to heighten interest
Break up chunks of text with relevant images to give the reader’s eyes a break. For product-based businesses, include product and lifestyle shots for variety.
Pro tip: For professional services, include photos of yourself and your team. I know, maybe you’re not that comfortable with being the face of your company. But you’d be surprised at the power of including your own face in your website. Customers want feel like they can trust you, and seeing your face is part of building that trust.
Optimise images
Create useful file names for each image before you upload them. Separate words with hyphens rather than spaces. For example, the image below for a real estate agent’s website could be named:
real-estate-agent-handing-house-keys-to-first-home-buyers.jpg

Using descriptions to name your photos helps people who have low vision or who are using screen readers to understand the image.
Compress your photos
Upload high-quality photos to your website, then use a plug-in like WP Smush to compress all your images in one click.
Compressed images help to improve your page load speed.

Most people won’t wait more than a few seconds for a web page to load before clicking away. Compressing your photos and videos will keep them on your website.
For those not using WordPress, compress your images with a free tool like CompressJPG before loading them to your website. Note: All photos in the Getty image gallery that comes with Websites + Marketing, Online Store and Managed WordPress have already been optimised — so you can skip this step.
Building links
After you’ve created all your web pages, go through and add internal links to the text. Highlight a relevant word and use the link icon (looks like two links of a chain) to insert a link to another page on your website. Obviously, these shouldn’t be random; rather, they should provide further information to the reader by taking them to a related page or blog post.
Pro tip: Create internal links that open in the same tab.
For concepts or terms readers might not understand, add links to other online sources that explain them. You could also include links to your professional affiliations, courses you’ve completed and links to happy customers who’ve written testimonials (“Read what our customers are saying about us”).
Pro tip: All external links should open in a new tab. This is usually a check box at the time you create the link. This means that your customer can view the other website without losing their place in your website.
Backlinks
Once your website is ready, start looking for related websites that might be willing to link to yours. Professional directories, suppliers and advertised listings can all drive traffic to your website.
Pro tip: Try linking to a specific page that’s relevant to the referring link. For example, if you’re a real estate agent listing on a directory for homeowners, you can link straight to your Sales Service page (or even a specific landing page for listings in that neighborhood) instead of to your home page; that can save people time hunting around for the information they need.
Prep your pages for search engines
WordPress site owners should use Yoast SEO to double check their website content is appropriate for their keywords.
Those who don’t have WordPress websites should check that each of their web pages has:
- Used your focus keywords/phrase in your page title, H1 heading and phrase variations in a couple of other headings.
- Keywords in the first 100 words and a few times throughout the body text.
- Keywords in the image file names and image alt text.
- At least 300 words (or more) of text on each page.
- Used simple language without industry-specific jargon (unless your website is strictly for industry insiders).
- Short paragraphs, and most sentences under 20 words.
Add social links
Add social media links to your website. The footer or the bottom of the web page is a great place to put social links, so they appear in a predictable place on every page. If your business focuses on social media for sales and engagement, put social links in every header too (that’s the top of each web page).
Plus, if you create a “global element” you only have to do it once! A global footer means that it’s the same on every page of your website. A typical footer includes a short Bio or About Us summary, a menu of popular pages, a contact form and your social links.
TEST, TEST, TEST
You’re nearly there! Now that all the content is in your website, it’s time to test. You can do this in Preview mode or you can send your website live and test it in the real world.
Check that links are working
Click every single link — internal and external, to check if the link works and goes to the right page. As a rule, internal links (where you’re linking to different sections of your own website) should open in the same tab; external links (links to other websites) should open in a new tab.
Review content
Do a final proofread of your content and look for spelling mistakes, formatting errors and inconsistencies. It’s hard to proofread your own writing, because you see what you expect to see. Ask a few friends to help, or hire a professional proofreader.
Check usability
Usability refers to how easy a website is for the average person to use. Ask someone to perform some basic functions on your website such as “read the services page and make an appointment booking” or “buy a [product] through the web shop.” Ideally you should stand behind them while they do it (resist the urge to say anything or help them) and watch how they interact with your website.

Look for problem areas:
- Is there a spot where they get stuck and find your website difficult to use?
- Are there any actions that they find confusing?
- Is the font size hard to read?
- Are pop-ups annoying and obtrusive?
- Is the website easy to use on a desktop, tablet and mobile device?
Before they finish, ask them to fill in your contact form: check what you receive and check the automatic reply that the customer receives.
Based on your findings and your testers’ feedback, make adjustments to your website as necessary to improve usability.
Pro tip: Choose testers who are similar to your target customer. If your target customer is a tech-savvy 20-something, it might not matter that your grandma finds the website tricky to use. Although, ideally your website would be simple enough for grandma to use as well.
Test website speed and mobile-friendly rating
Once your website is live, it’s a good idea to check your page load speed and mobile-friendly rating.
If your page load speed is slow, check:
- That you’ve compressed all your images.
- If any of your plug-ins are slowing things down (test them here).
- If redirections are the cause of the slowdown (there’s a WordPress plug-in for this).
Make improvements and test again until you’re satisfied that your website load speed is as good as it can be.
Resources:
How to set up a permanent 301 redirect
Remember, done is better than perfect
Trust me, I know how tempting it can be to tinker with your website until you think it’s perfect. But the truth is, every week you spend without a website is a wasted opportunity. Good enough is good enough.
Get it launched, get noticed and start climbing the Google rankings.
After your website is up in its basic form, you can continue to add pages and features in the future.
This is especially important for new businesses that need to get started. Just get your business out there in the most affordable way possible.
For this reason, it’s worth considering a basic DIY website that you can complete in a day or two (perfect or not) and a custom design later when your business grows and you can afford it. At least you’ve got a website helping you to make money and test your business ideas. Then if you want a fancy and expensive website down the track, you can take your time to build it (or outsource it) later.
Recap: Design and build your website
- Choose between DIY and DIFM.
- Start with a website template or theme.
- Install plug-ins (WordPress) and an SSL.
- Create pages and insert content.
- TEST, TEST, TEST.
Step 5: Track, assess, improve

Congratulations, your website is live! This is a massive achievement, whether you built it yourself or engaged a pro, and it’s worth celebrating.
But you’re not quite done. In fact, your website needs regular monitoring to perform well for your business.
Read on for tips to manage your website once it’s up and running.
Set up Google Analytics

To improve your website, you need to understand more about how people use it. Google Analytics is a free tool that helps you:
- Monitor your website traffic.
- Understand which devices customers are using (mobile, tablet, desktop; iOS, Android, etc).
- Discover where visitors come from (by country and city).
- Learn which site pages are most popular.
- Follow user flow through your website.
You can use this information to improve the SEO of low-performing pages, and beef up the content on high-traffic pages for even better results.
There are also Google Analytics plug-ins that you can install on WordPress. That means you can view traffic and user data straight from your dashboard, without logging into Analytics separately.
Installing analytics can get a bit technical. Try doing it yourself and if you get stuck, ask a pro for help. You’ll need to set up a Google Analytics account and set up a property. It takes time for Google Analytics to crawl your site and start collecting data, so you should set it up as soon as your site goes live. That way, you can watch your website traffic grow over time.
Resources:
Google Analytics website traffic analysis 101
8 SEO tools to get your small business ranking on Google
Post-publish SEO tasks
If left to their own devices, it can take anywhere from a few days to a few months for search engines to notice there’s a new website online. So when your new website goes live, or any time you make major changes to your structure or content, it’s a good idea to let search engines know.
Submit your website to Google Search Console
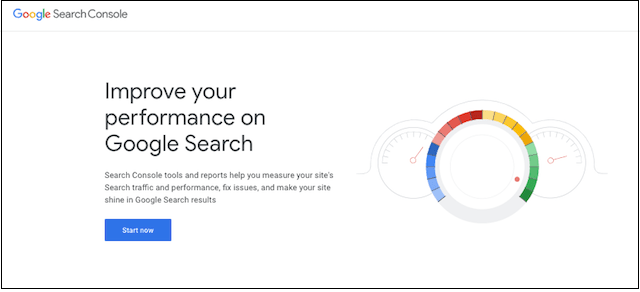
Google Search Console tools help you measure your website’s traffic and performance. It helps you to identify and fix issues — there’s even a handy mobile usability report.
To set it up, go to Google Search Console and login with the Google account you want to use with your website. Ideally this would be the primary email address associated with your website. Follow the prompts to set up a new account if you need to.
Type in (or copy and paste) your full URL including the https:// part. A box will open asking you to verify that you own the website. There are a few methods for verification:
- Downloading a verification file and uploading it to your website.
- Adding an HTML tag to your website’s <head> section.
- Use a Google Analytics account.
- Use a Google Tag manager account.
- Edit your DNS settings.
This is another tricky technical set up. Personally, I found the simplest method to be the “adding an HTML tag” option. In your website’s CMS, switch the view from a builder to viewing the website’s source code, to find the <head> section in the first paragraphs of the code.
You can paste the special Search Console code there, being careful not to change any other code in the section. The verification code looks like this, and is unique to every website:
<meta name="google-site-verification" content="Your unique code here" />
Invite Bing to the party too
Bing Webmaster Tools is Microsoft’s equivalent of Google Search Console. While Bing isn’t as popular as Google, it is a common search engine, so you should verify your website and ask Bing to crawl it as well.
Resources:
Managing your website once it’s up and running
Claim your free Google My Business listing
Local SEO is powerful. These are the search engine optimisation tactics designed to attract customers from a defined geographic area.
Think about how often you’re out to find “restaurants near me” or choose map-based search results. As long as you have location services turned on, your mobile knows where you are and can provide local search results. It’s super convenient!
Your Google My Business listing puts you on the map.
For businesses with a physical shopfront, you need to list all your store locations. For business services such as “marketing coach” you can set up your location to the area you want to service. You don’t have to include a physical address if you work from home and want to keep your address private.
There’s no point being greedy and setting the whole of Australia as your target area. Focus on your local area and build your authority there first. People from other locations will find you as your business grows.
Keep an eye on unsolicited backlinks
Not all backlinks are positive for your business. Mostly it comes down to the domain authority of the site sending you a link. If a dodgy website is sending a link to your website, that makes you look bad. Monitor who’s linking to your site and disavow the damaging links
Sign up for a free MOZ account to use Link Explorer and do 10 free queries per month. Link Explorer shows:
- What website the backlink came from.
- The anchor text (i.e. the words the hyperlink is attached to).
- Whether the link is follow or no follow (for crawling purposes).
- The referring website’s page authority and domain authority (how trusted the site is).
- The referring website’s spam score.
If you see lots of lovely backlinks from relevant pages that you trust, you’re all fine. But if you see a backlink from a website that has a low domain authority and a high spam score, investigate further. Dodgy links from spammy websites can damage your own domain authority and hurt your search rankings. By choosing to disavow a backlink, you’re telling Google not to take these links into account when assessing your site.
Resources:
How to discover and monitor bad backlinks
Clean up your bad backlinks
Start a blog

Google loves high-quality content. More high-quality content on your website means better rankings.
After your basic website has covered your core products and services, you can start a blog. For retail businesses, this can cover topics like:
- Seasonal styling tips.
- “How to” (e.g. wear this scarf 6 ways).
- Product range highlights.
For professional services websites, your blog can be a font of knowledge about your industry, hot topics and useful tips.
- Choose one long tail keyword or phrase (that you haven’t already used on your website) for each blog post.
- Write interesting and relevant content and include some images.
- Include a call to action and internal links to other pages on your site.
Your blog doesn’t have to be a hard-sell of your core services. In fact it’s better to be a helpful and interesting source of information for your visitors. That builds trust.
Make a list of topics to write about, starting with your customers’ top questions.
Blog as often as you’d like, but choose a schedule that you can keep up with. Start with once or twice a month and see how that goes. When business gets busy it can be hard to find time to write your own blog. As with website content, you can always hire a professional copywriter to do this for you.
Be sure you add a subscription widget to your website to invite visitors to opt-in for your newsletter (included with all GoDaddy websites; easily added to WordPress websites via plug-ins). This is how you’ll build a mailing list in a way that conforms to Australia’s spam laws.

Each time you publish a new blog post, you can send it out to your subscribers via email. You can also automate your emails — for example, automatically sending a welcome email when someone subscribes or buys something in your online store. GoDaddy can help you set up and manage email marketing for your business (this tool is included with GoDaddy’s Websites + Marketing and Online Store).
Resources:
Start a WordPress blog this weekend
Recap: Track, assess, improve
- Set up Google Analytics.
- Submit your website to Google for indexing.
- Claim your free Google My Business listing.
- Start a blog.
Good luck!
Wow, that was a lot of information, wasn’t it?
After reading this, I hope you’re feeling ready to tackle building your first website. Work through the process step by step and I promise you’ll be amazed at what you can produce on your own. Go on, give it a try.
Bookmark this eBook to come back to during each phase for extra resources, and as a to-do list of tasks. If you get stuck, you can always seek help for that step. There’s a wealth of information and instruction videos online, particularly for all things WordPress.
There are heaps of how-to videos online. Just ask our mate Google!
GoDaddy also has resources and advice for all aspects of building a website. Search the comprehensive GoDaddy blog for topics or call the 24/7 Australia customer support centre. The team is super helpful and able to point you in the right direction.
I wish you all the best with your new website. It’s going to be smashing.
Toolbox
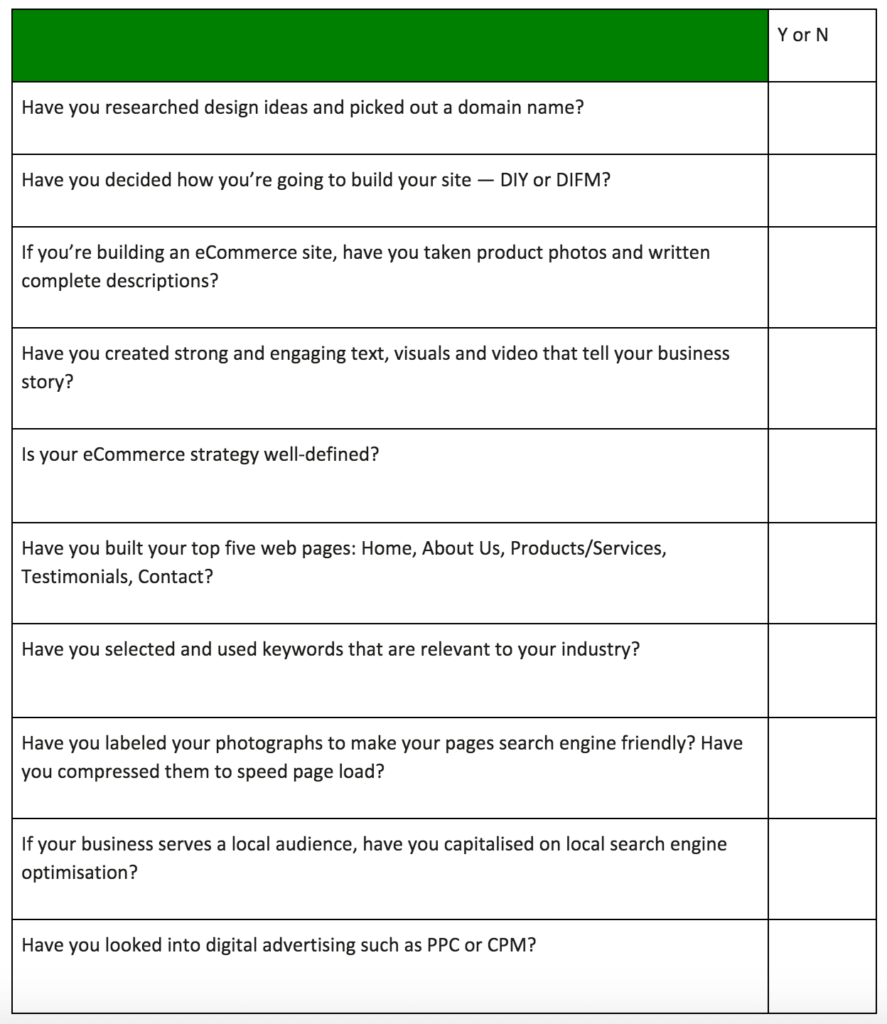
Website planning quiz
To get a pulse of where you’re at with your website, answer the following 10 questions. If you answer Y to eight or more questions, your site is ready to go live. If not, keep at it and revisit the checklist when you’ve completed more steps.
Finished? Great! Count the Ys you marked to see if you’re prepared to launch your site.
0 – 4 Sounds like you’re just beginning your journey. If you’re in need of guidance or have questions about some of the steps, get in touch with GoDaddy. Our experts are very supportive and enjoy contributing to your success.
5 – 7 You’re headed in the right direction! Narrow in on one area and work your way through it.
8 – 10 You’ve got this! Want to elevate your game? Consider adding email marketing to your arsenal.
QUICK GUIDE: Build a DIY website in 6 steps
Want to try try your hand at starting a website with GoDaddy’s swipe-to-style Websites + Marketing? Follow these steps.
1. Start for free
To get started, click Start for Free on the Websites + Marketing product page.
The introductory version of Websites + Marketing is free forever. For many small business owners — especially those who don't plan to sell anything via their websites — this is all they need.
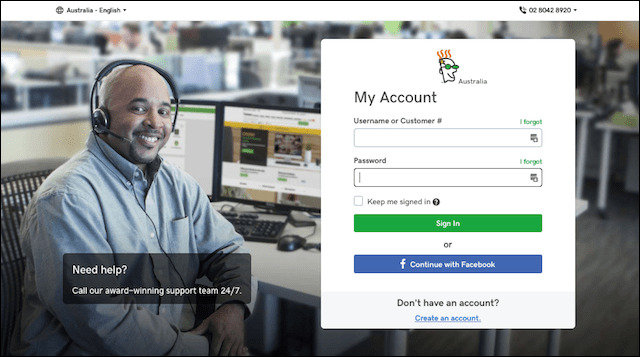
2. Sign in or create an account
If you already have a GoDaddy account, you can sign in either directly or through your Facebook account. If not, create a new account by clicking on Create an account. Again, no need to enter payment information at this stage.
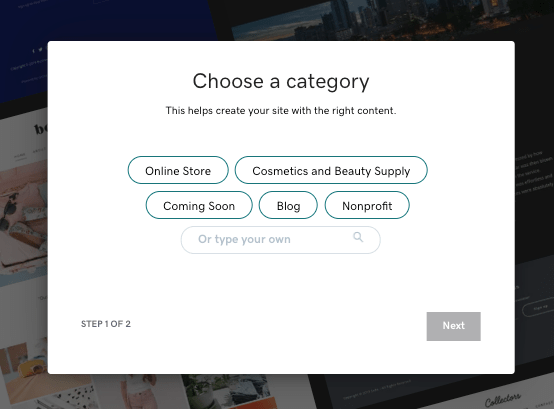
3. Choose a business category
Next you’ll be asked to choose a category for your website. You can either choose one of the options on the screen or type in your business type — Clothing or Home Services, for example. Click Next.
Next, you'll be asked 'What should we call your site?' Simply type in the name of your business or web address.
4. Customise your website
Seconds after you click Next, a hand-picked website layout appears, with the tools to change the theme, pages and site settings shown on the right.
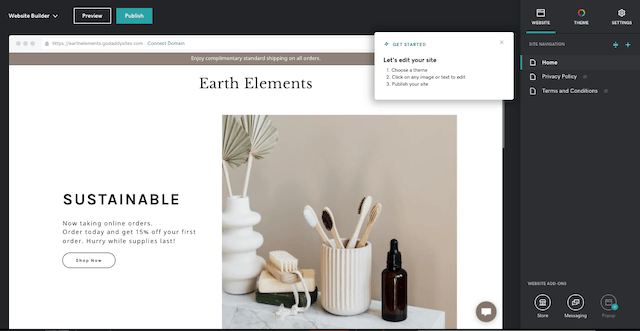
By clicking on Theme in the upper right, you can reset the layout, colours and font. Click through two dozen themes until you find one you like. Click Done.
5. Adjust your site settings
Located in the upper right, the Settings tab allows you to change your:
- Basic information like business name, street address, email, phone, etc.
- Domain name associated with the website (optional).
- Search engine optimisation.
- Social Accounts.
- Google Analytics, the Pinterest meta tag and the Facebook pixel.
- Cookies, tracking options and more.
You can return to Site Settings to make changes at any time — if you should change locations, for example.
6. Preview and publish
After customising the template with your own text and photos, click the Preview button in the top left to see what your new website will look like on a desktop computer, as well as on a smartphone.
Continue making changes to your site for as long as you wish by toggling between Preview and the Edit Site button on the top right.
When you are ready to make your website public, click the Publish. Your website is up and running!
CHEAT SHEET: Make a WordPress website in 5 steps
If you’re looking for an easy way to build and maintain a WordPress website or eCommerce store, follow these steps.
1. Choose a Managed WordPress plan
No matter who you are, if you want to use WordPress, you’ll probably need to pay someone for hosting. GoDaddy offers several tiers of Managed WordPress, all including hosting. The higher tiers come with added features.
To get started creating your WordPress website with GoDaddy, purchase a plan and answer a couple of basic questions.
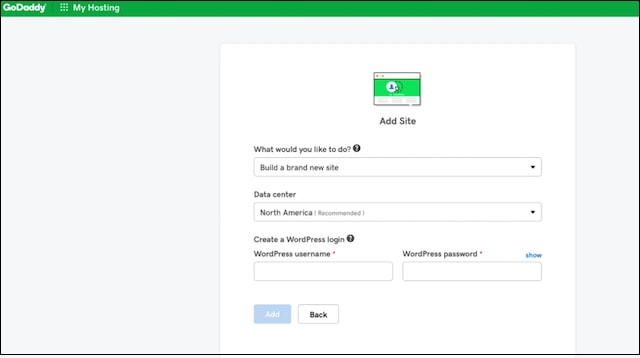
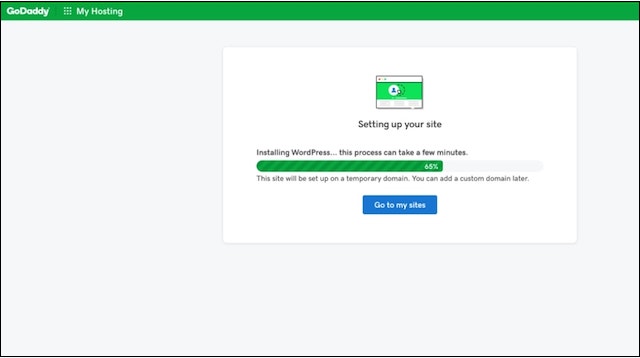
Next, GoDaddy automatically installs WordPress while you get a fresh cup of coffee.
2. Set up your WordPress website
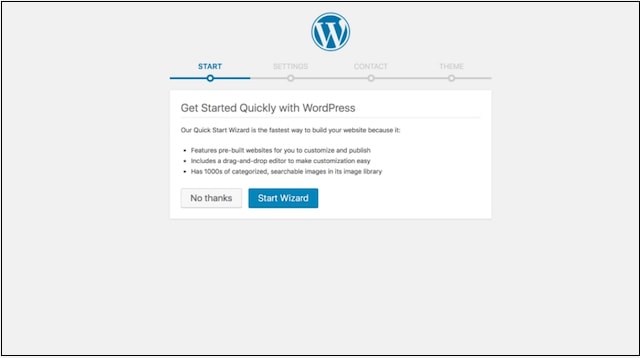
Now you can either use the Quick Start Wizard to get started or configure your site on your own. You’ll find step-by-step instructions for both options here.
Once WordPress is installed, you can access it anytime by adding ‘/wp-admin’ to the end of the domain you’re using. Use the login and password you created during installation to log in.
Alternatively, you can access the WordPress admin page by clicking the WP Admin button.
3. Make it your own
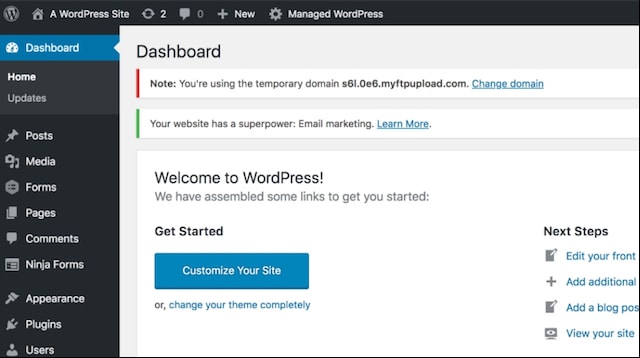
To start tailoring your new site, you can either click Customise Your Site from this screen or Appearance in the left sidebar then select Themes.
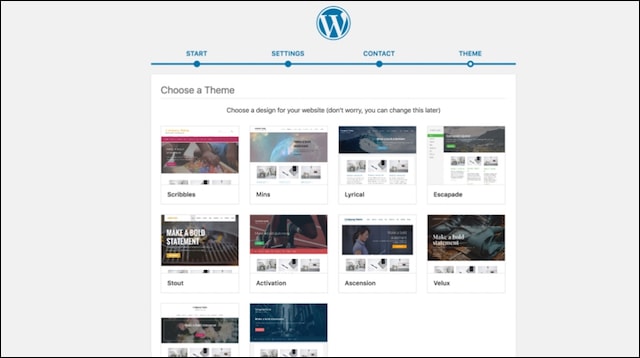
Click through the themes until you find one you like. Keep in mind that all colours and photos can be changed. So what you're looking for is a general "look" that suits your business. Click Select.
4. Adjust your site settings
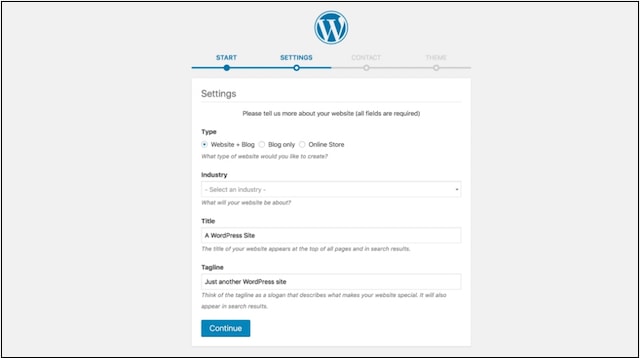
The Settings screen allows you to adjust general blog settings, including your industry as well as the name of your website and your business tagline (if any).
5. Preview and publish
As you customise your site with text, photos and videos, click the Preview button in the right sidebar to see what your new website will look like on the web. Continue making changes to your site for as long as you wish, using Preview to check your work from time to time.
When you are ready to make your website public, click the Publish button. Your website is up and running!